Thinking Outside the Box with Cisco DNA Center

What other applications does DNA have?
Cisco’s DNA Center appliance is generally talked about in the context of SD-Access (SDA), but SDA is a complex technology that involves significant planning and re-architecture to deploy. DNA Center is not just SDA, though – it has multiple features that can be used on day 1 that can cut down on administrative tasks and reduce the likelihood of errors or omissions. From conversations with our customers, the most asked-for capability is software image management and automatic deployment, and that is something that DNA Center handles extremely well compared to many other solutions out there.
Wait…I can manage software updates with DNA?
Managing software on network devices can be a substantial time burden, especially in businesses that have a substantial compliance burden and require regular software updates. Add to this the increasing size of network device images – pretty much all the major switch and router vendors’ products now have image sizes in the hundreds of megabytes up to several gigabytes, and software management can now take up a significant chunk of an IT department’s time. One of our customers is interested in DNA Center for this specific purpose – with 500+ switches, being able to automate software deployment saves several weeks of engineer time over the course of a year.
That may leave you asking…
So, what devices can I manage?
DNA Center can manage software for any current production Cisco router, switch, or wireless controller. Additionally, some previous-generation hardware is also supported. Of this hardware, the Catalyst 2960X and XR switches as well as the Catalyst 3650/3850 switches are the most commonly used with DNA Center. Now let’s talk about how DNA Center does this.
Neat! Now, tell me how to do it.
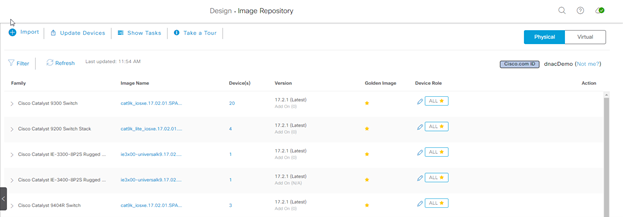
First, be sure that every device you want to manage is imported into DNA Center. Once that’s done, the image repository screen will automatically populate itself with available software image versions by device type.
Here’s an example:

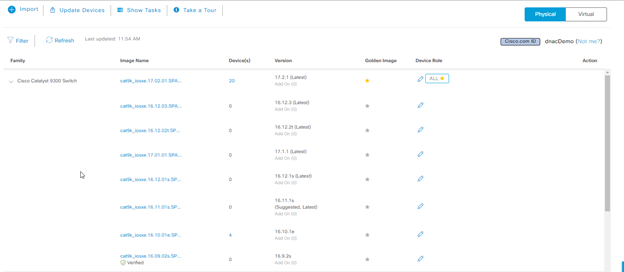
From here, select the device family to see details. Once you’ve decided on the version you want to use, click on the star icon, and DNAC will mark that as the golden image (aka the image you want to deploy). If not already present on the appliance, the image will also be downloaded as well.

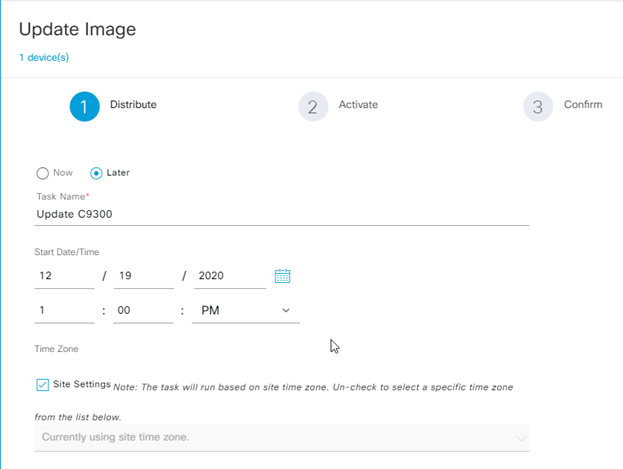
Next, go to Provision > Network Devices > Inventory to start the update process. From here, select the devices you want to update, then click on Actions > Software Image > Update Image. You’ll be given the option to either distribute the new images immediately or to wait until a specific time to start the process. Different upgrade jobs can be configured for different device groups as well.

Here, I’ve set DNAC to distribute images on Saturday the 19th at 1pm local time for all my sites. This process is just the file copy, so no changes are made to the devices at this time. The file copy process is also tolerant of slow WAN connections, though not poor-quality connections. We’ve tested this process in our lab and found out that it’ll happily work even over a 64k connection (though it’ll take quite a while). Poor quality connectivity, however, will cause this process to fail. Finally, once the image is copied to the target devices, a hash check is performed to ensure the image hasn’t been corrupted.
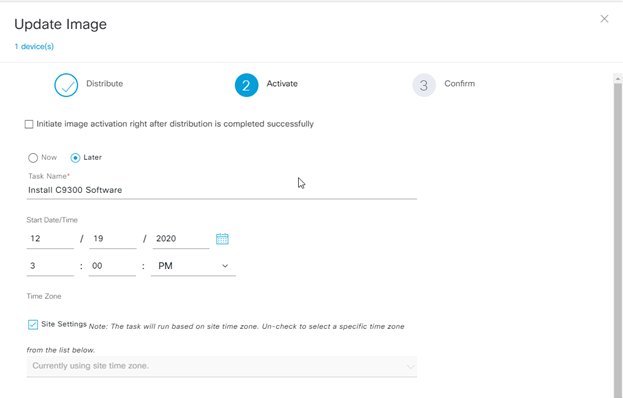
The next step is to activate the image. Activation here means ‘install the image and reboot the device’.

Like the distribution process, DNAC can either install immediately or wait until a scheduled time. Note that for IOS XE devices, this process will do a full install of the image vs. just copying the .bin file over. Once the software activation is complete, the devices will show their status in the inventory screen. As you can see, DNA Center’s software image management capability can save substantial time when updating software as well as ensuring that no devices fail to receive updates through error or omission.
Prepared by: Chris Crotteau
